
Saturday, January 28, 2017
Beautiful You...
I knew it had been some time since I posted on my blog, but I had no idea it had been SOooo long. I've been busy loving my granddaughter and also with work of course, but today I was able to spend a little time in my craft room. Yesterday, my SU Beautiful You stamp set arrived and I've been dying to get my hands on it. I had some rare, quiet time today after watching Elli since yesterday morning,
 so I put together three quick cards. I am going to love creating with this great set. You can use watercoloring (my new WC pencils should be here in a couple of days), paper piecing, heat embossing, or even leave them plain. No matter what you choose, you will create something beautiful!
Sunday, July 24, 2016
July Tim Holtz tag challenge
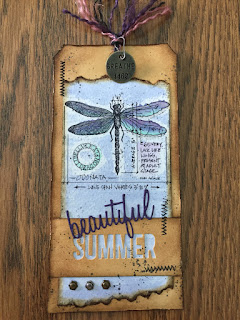
I sure do look forward to our monthly tag night at thecraftshack.biz creating our versions of Tim Holtz 12 tags of 2016. Sadly, I haven't finished my June tag but I hope to do that soon. I just wasn't feeling it and haven't had the creativeness to pull it together. This month though, the moon and stars were lined up just right and I really enjoyed putting this one together.
I chose to use the dragonfly blueprint stamp that I won in May's challenge. I just love the details you get with Tim's stamp sets.
Check out Tim's blog to see the details behind the two techniques he combine this month.


I chose to use the dragonfly blueprint stamp that I won in May's challenge. I just love the details you get with Tim's stamp sets.
Check out Tim's blog to see the details behind the two techniques he combine this month.


Sunday, May 22, 2016
May Tag Challenge
i missed my Giggler night because of the stupid flu. So...I had to do the May tag by myself. Not as many laughs for sure, but it was still fun! The tissue tape really resisted the stamp well and the tattered florals were fun!


Saturday, April 30, 2016
April Tag Challenge
At first, it felt like a Kindergarten class piecing together little snippets of paper, but it was surprisingly relaxing. All in all, the Gigglers had fun creating our versions of Tim Holtz's April tag challenge. This month was a remix of the faux mosaic and paint resist techniques. We used his new paper mosaic kit that includes grout, glue, and glaze with enough left for many more projects. I think I will have to do a few more before I get the hang of not covering my grout too much. I had too much glue and glaze to be able to get my distress ink between the pieces.


I'm short for words today as we finally finished two of the three renovation projects we have going. After two weeks, I can finally do some laundry which will probably take all weekend. Good thing it's rainy and chilly so I'm forced to stay inside and get it done. Also a good thing that my craft room is a whole floor away from the laundry room because it's days like this that lure me to my paper and scissors!


I'm short for words today as we finally finished two of the three renovation projects we have going. After two weeks, I can finally do some laundry which will probably take all weekend. Good thing it's rainy and chilly so I'm forced to stay inside and get it done. Also a good thing that my craft room is a whole floor away from the laundry room because it's days like this that lure me to my paper and scissors!
Wednesday, March 16, 2016
March Tag Challenge
We sure had fun last night at The Craft Shack creating our versions of Tim Holtz 12 Tags of 2016 March tag. This month, Tim combined two past techniques; textures and dimensional die cuts.
 The top layer is simply cardboard cut away with Movers and Shapers Mini Tattered Florals dies. I then randomly tore away the top layer and rubbed a small amount of Gesso on the exposed ribs. I inked the top with my favorite, Walnut Stain Distrsss Ink and I further grunged it up by spritzing Ground Esspresso and Gold Metallic Distress Stains with a small amount of white on top. While that was drying, I used a Manila tag and placed various mixed media thinlet dies and cut. This layer was placed over top of another blank Manila tag and printed tissue paper was adhered to the areas under which the die cuts would be placed. Mixed medium was used both under and on top of the tissue to hold it in place. The top tag was then adhered to the top with mixed medium and allowed to dry. Gesso was brushed all over the top of the tag, then immediately wiped off with a baby wipe leaving bits of residue behind. I then used Tim Holtz' new Distress Crayons and placed various colors all over the die cut areas, blending with my finger. Too cool! (It was so cool, I ordered each color pack of the crayons)! Next I adhered the distressed cardboard layer over the crayoned layer so that the colors showed through the cut outs. The gold spots are made by rubbing a glue stick and holding a piece of foil sheet on the area for a couple of minutes. Lift off a and voila! I evened the edges of the tag and distressed and inked to even out the color. A few embellishments from Lisa's stash and it was finished. Check out Tim Holtz' blog for more details.

Sunday, February 28, 2016
Sunday morning fun
I'm taking a break between loads of laundry to post some pics of a few cards I was able to make earlier today. I apologize for the lousy photography; I have to find better lighting and hold my iPhone straighter, lol!
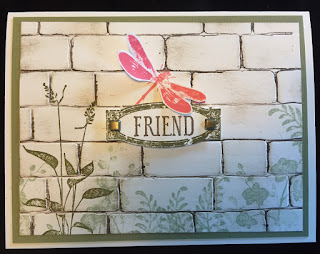
I just received my new Brick Wall embossing folder from Stampin Up and was anxious to give it a try. I used the direct-stamping technique on the folder before embossing to achieve the look of mortar between the bricks. I scuffed up some of the bricks with my favorite embossing ink, Walnut Stain. I used my SU Awesomly Artistic and World of Dreams stamp sets to add the foliage and dragonfly. I stamped an extra dragonfly, fussy cut his wings and attached to the stamped image for some dimension.
Also in my Stampin Up order was the new Confetti Embossing folder. As with most of my projects, I saw the idea of multi-color inking of the raised image in a Pinterest post and had to give it a try. I stamped and popped up a die cut oval to cover the debossed area in the center. If you're in need of a quick, last minute card, this folder is perfect.

My last card was made using the faux 3-D stamping technique; an old one but deserves to be resurrected from time to time.
I used the Skywriting stamp from Memory Box and stamped on top of three, stacked papers of graduating sizes. I left them stacked and sponged on some Stormy Sky and Chipped Sapphire embossing ink. I then Popped each layer on the plum cardstock cut slightly larger on each layer. I tied some glitter string, added a pretty bead, and adhered the stack to an ivory base card that I sponged with some more Chipped Sapphire.

I just received my new Brick Wall embossing folder from Stampin Up and was anxious to give it a try. I used the direct-stamping technique on the folder before embossing to achieve the look of mortar between the bricks. I scuffed up some of the bricks with my favorite embossing ink, Walnut Stain. I used my SU Awesomly Artistic and World of Dreams stamp sets to add the foliage and dragonfly. I stamped an extra dragonfly, fussy cut his wings and attached to the stamped image for some dimension.

Also in my Stampin Up order was the new Confetti Embossing folder. As with most of my projects, I saw the idea of multi-color inking of the raised image in a Pinterest post and had to give it a try. I stamped and popped up a die cut oval to cover the debossed area in the center. If you're in need of a quick, last minute card, this folder is perfect.

My last card was made using the faux 3-D stamping technique; an old one but deserves to be resurrected from time to time.
I used the Skywriting stamp from Memory Box and stamped on top of three, stacked papers of graduating sizes. I left them stacked and sponged on some Stormy Sky and Chipped Sapphire embossing ink. I then Popped each layer on the plum cardstock cut slightly larger on each layer. I tied some glitter string, added a pretty bead, and adhered the stack to an ivory base card that I sponged with some more Chipped Sapphire.

Saturday, February 20, 2016
February Sweetheart Tag
Thursday evening was a blast creating this fun tag with my fellow crafters at The Craft Shack, our favorite supply store and crafting hangout. We are following Tim Holt's 12 tags of 2016 and learning all of his techniques. For each month this year he is mixing two techniques from prior years; this one being the monoprint from June 2014 and the embossing texture paste from March 2015.

I began by sponging a manila tag with antique linen distress ink then lightly spritzing it with water for a mottled effect. I then used Tim Holtz's flourish stencil and inked the back of it with frayed burlap distress stain spritzed with water, and cleaned the edges with a paper towel. (This ensures you won't get a line at the edge of your design.) I flipped the stencil over and layed it horizontally on the tag then pressed lightly all over with a paper towel, transferring the ink to the tag. I repeated this step two more times to completely cover the tag. What a great muted background! You'll have to experiment with the amount of water to spritz and the type of stencil to get the proper effect.
Next, I used a heart stencil and some fired brick distress ink and applied some random hearts. A finger dauber works great for this so you can achieve some faded edges.
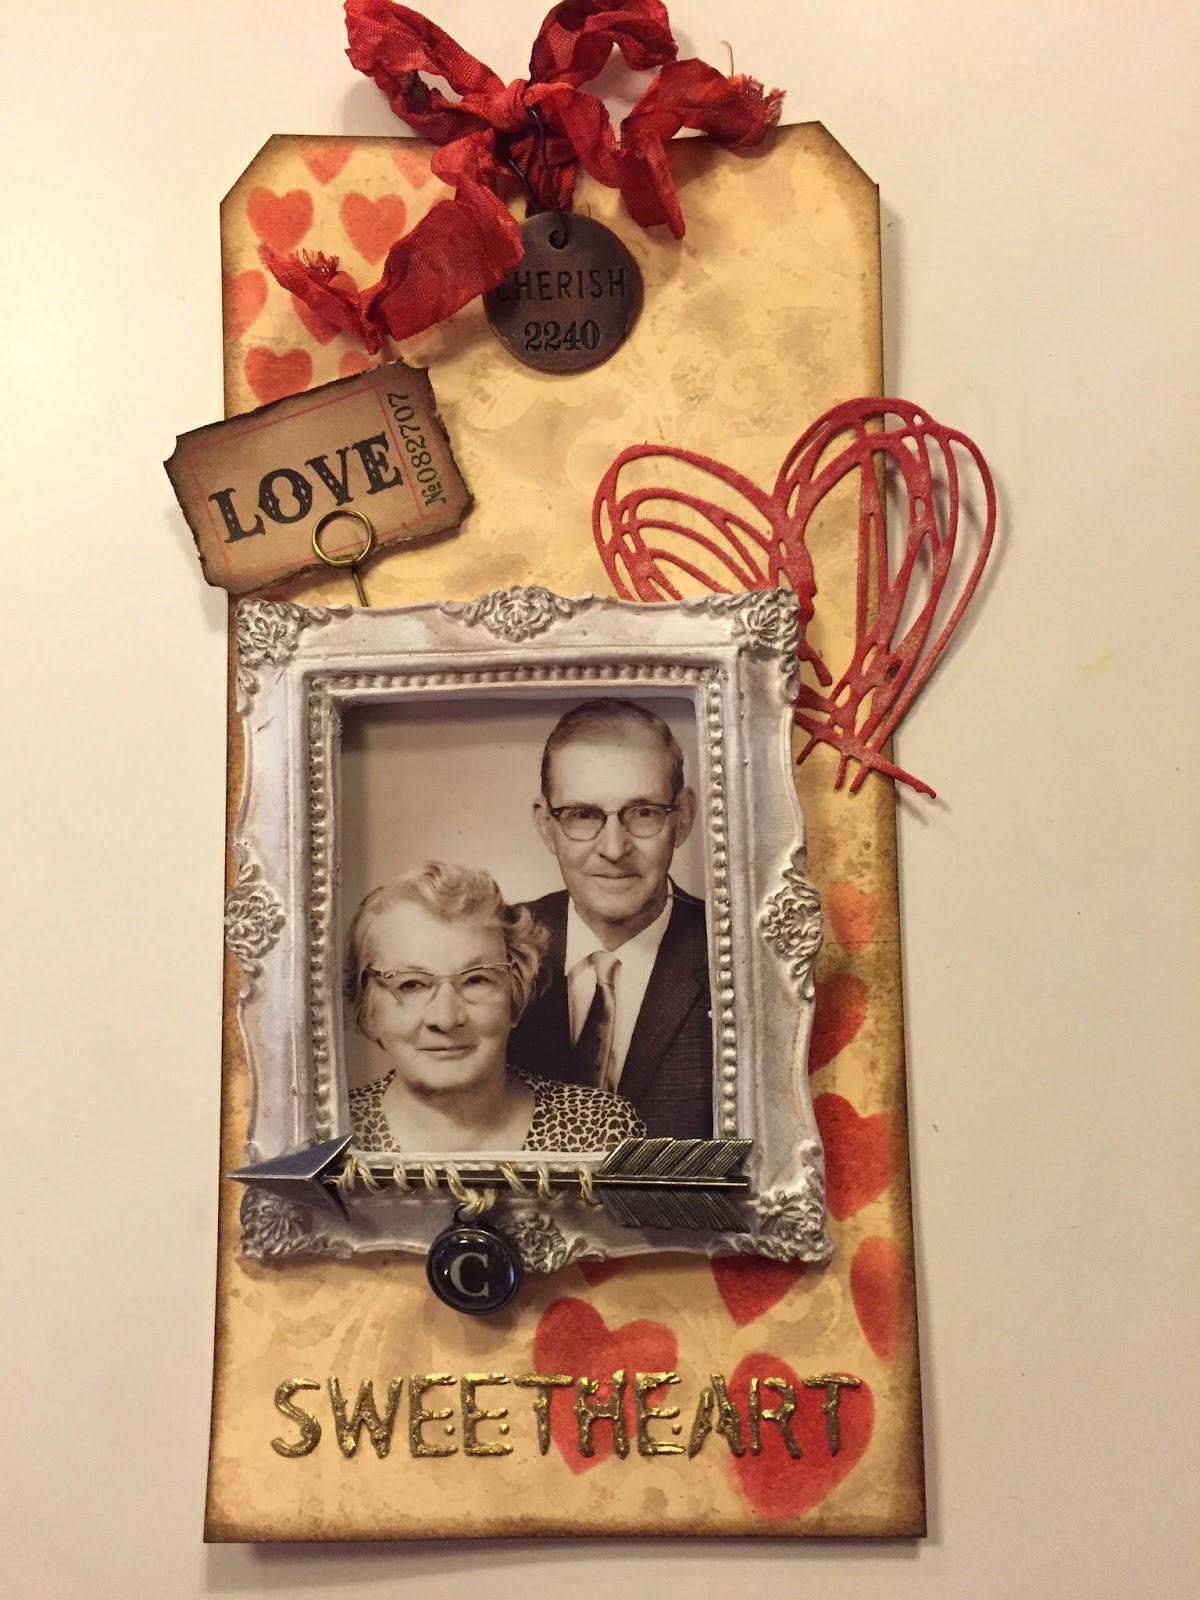
For the second technique, I used some modeling paste and applied over a sweetheart word stencil. While still wet, I applied some gold distress embossing powder, tapped off and let dry thoroughly. Once dry, I heated with a heat gun only until the powder melted. You don't want to over heat and melt the paste. Wow, does the make the words pop off the tag! It's hard to see here, but I love it so much, I might do it on all of my projects!
To finish off, I used a frame around a very old, dear picture of my great grandparents. The heart was cut using Tim's Scribbles and Splat thinlet die and spritzed with Biscotti perfect pearls. Hanging from the arrow is a charm with the letter C for Coates. I added a "love" ticket, cherish charm, and crinkle ribbon died with fired brick.
I can't wait for March to see what two techniques he will combine.
I began by sponging a manila tag with antique linen distress ink then lightly spritzing it with water for a mottled effect. I then used Tim Holtz's flourish stencil and inked the back of it with frayed burlap distress stain spritzed with water, and cleaned the edges with a paper towel. (This ensures you won't get a line at the edge of your design.) I flipped the stencil over and layed it horizontally on the tag then pressed lightly all over with a paper towel, transferring the ink to the tag. I repeated this step two more times to completely cover the tag. What a great muted background! You'll have to experiment with the amount of water to spritz and the type of stencil to get the proper effect.
Next, I used a heart stencil and some fired brick distress ink and applied some random hearts. A finger dauber works great for this so you can achieve some faded edges.
For the second technique, I used some modeling paste and applied over a sweetheart word stencil. While still wet, I applied some gold distress embossing powder, tapped off and let dry thoroughly. Once dry, I heated with a heat gun only until the powder melted. You don't want to over heat and melt the paste. Wow, does the make the words pop off the tag! It's hard to see here, but I love it so much, I might do it on all of my projects!
To finish off, I used a frame around a very old, dear picture of my great grandparents. The heart was cut using Tim's Scribbles and Splat thinlet die and spritzed with Biscotti perfect pearls. Hanging from the arrow is a charm with the letter C for Coates. I added a "love" ticket, cherish charm, and crinkle ribbon died with fired brick.
I can't wait for March to see what two techniques he will combine.
Subscribe to:
Posts (Atom)